Interested in learning how to create an MS SQL database in SolidCP? Don't worry; we've got you covered. Just follow these straightforward steps:
Step 1: Sign In
Your first task is to log into your SolidCP account. Make sure to use your specific username and password.
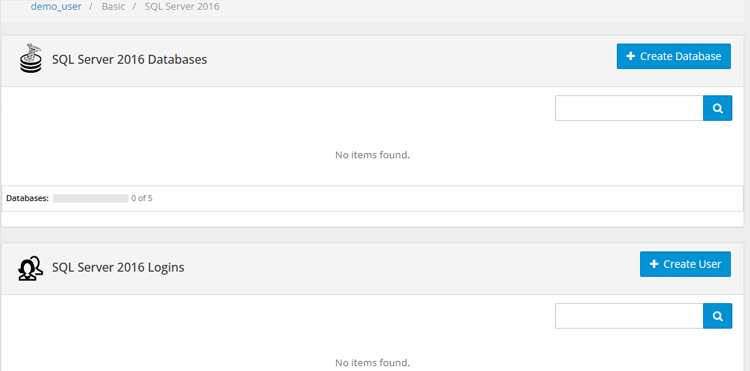
Step 2: Locate 'Databases'
Once you're logged in, search for the 'Databases' option in the main menu under the 'Hosting Spaces' section.
Step 3: Choose 'SQL Server'
Within the 'Databases' category, there are various options. Here, you need to click on 'SQL Server 2016' or 'SQL Server 2019' depending on which package you choose.
Step 4: Start Creating Your Database
Now, you'll see a button labeled 'Create Database'. Click it to initiate the process of setting up your new MS SQL database.
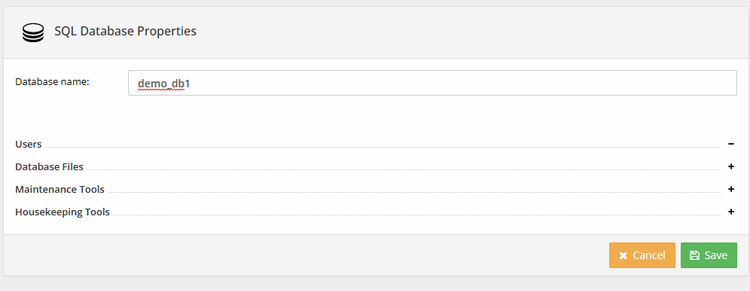
Step 5: Input the Database Details
Next, you'll need to provide some information.
Start with a name for your database.
Make sure to select something unique and easily identifiable.
Step 6: Click 'Save'
After you've filled out all the required information, simply hit the 'Save' button to establish your new MS SQL database.
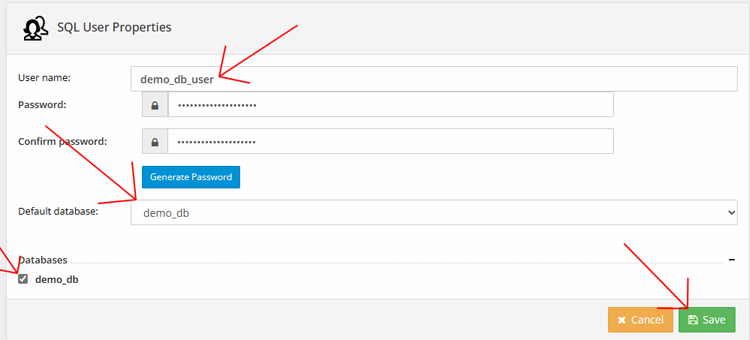
Step 7: Create Database User
After saving, you'll need to create a user for your new database. Click on the 'Create User' button.
Step 8: Provide User Details
Now, you need to input some details for your new user. This includes a username and a password, which you'll need to confirm. Choose something that you can remember but is also secure.
Step 9: Finalize User Creation
Once you've filled in the user information, hit the 'Save' button to finish setting up your new database user.
And there you have it! You've successfully created an MS SQL database in SolidCP. Enjoy your new database!
