So you'd like to learn how to add an FTP account in SolidCP? Well, you've come to the right place. Let's get started.
Step 1: Log In
First thing's first - you've got to log into your SolidCP account at SolidCP Login (webtechsolutions.co.za) . Just type in your username and password, and you're in!
Step 2: FTP Account
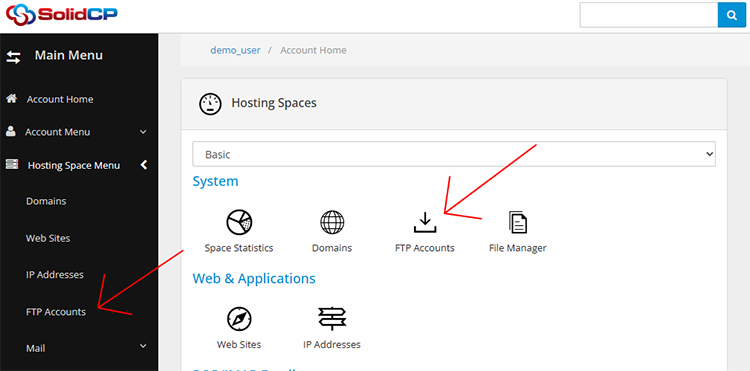
Next up, you need to find the "FTP Accounts" icon in the System menu or use the menu, it's pretty easy to spot, just look under "Hosting Spaces."
Step 3: Creating New FTP Account
Right, we're making progress. Now, you'll see a "Create FTP Account" button. Give it a click.
Step 4: Filling in the Details
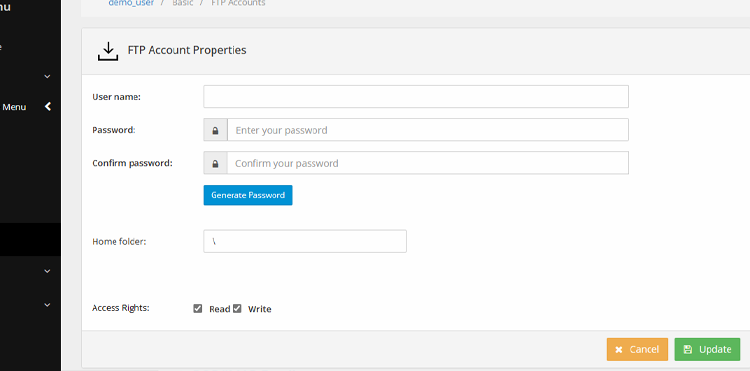
Here's where you need to provide a bit of info. You'll need to come up with a username for the new FTP account. Keep it something easy for you to remember, but not too easy for others to guess! Next, you'll need to enter a password and then confirm it. Just like the username, you want this to be strong and secure. You can use the "Generate Password" Button.
Next, set the "Home Folder." This is the folder that the FTP account will have access to. Lastly select the allowed permissions for the user account.
Step 5: Configuring Read & Write Access
You might want to specify what kind of access this account will have. This includes determining whether it has read and/or write permissions. Let's break this down a bit:
-
Read Access: This allows the FTP account to view and download files from the specified folder. If you want the account to only access and download files, then this is the option you should choose.
-
Write Access: This allows the FTP account to upload and modify files in the specified folder. If you want the account to make changes or add new files, you should give it write access.
To adjust these permissions, you'll need to navigate back to your list of FTP accounts and locate the account you want to edit. Once you find the right account, click on the 'Edit' button next to it. Here, you can select the level of access you want to grant.
Remember, it's important to be careful when assigning write access, as this allows the FTP account to change and delete files. Only provide this level of access if it's absolutely necessary.
Step 6: Save Changes
After you've set the desired access level, don't forget to save your changes. Click on the 'Save' button, and
And voila! You've just created a new FTP account in SolidCP. Easy, right?
Don't worry if it feels a bit confusing at first - you'll get the hang of it in no time. Happy hosting!
